Receiving a quote for thousands of dollars to widen a doorway for wheelchair access can feel defeating. However, before considering demolition, a structural engineer’s approach reveals several low-cost, non-invasive strategies. By focusing on smart hardware like swing-clear hinges and strategic trim removal, it’s often possible to gain the crucial 2-4 inches needed for accessibility, saving you from unnecessary structural work and expense.
The contractor’s assessment can land like a sledgehammer: “To get a wheelchair through here, we’ll need to tear out the frame, move the electrical, and rebuild the wall.” The projected cost can immediately make aging in place feel like an unaffordable dream. For many homeowners, this is the moment they’re told that creating an accessible home requires extensive, expensive, and disruptive structural renovations. The default advice often involves moving studs, installing new headers, and dealing with the cascading costs of drywall, paint, and electrical work.
This approach assumes the only solution is brute force. But what if the problem isn’t the wall itself, but the geometry of the opening? From a structural engineer’s perspective, the goal is to maximize usable clearance with minimal intervention. Before you approve a demolition budget, it’s critical to analyze the system for its hidden opportunities. The real key might not lie in moving load-bearing walls, but in outsmarting the existing structure with precise, strategic modifications that reclaim lost inches.
This guide will walk you through a cost-conscious, problem-solving framework for widening doorways. We’ll analyze high-impact, low-cost hardware, evaluate the true risks of common “solutions” like pocket doors, and provide a roadmap for making your home more accessible without breaking the bank. It’s time to trade the sledgehammer for a screwdriver and a strategic plan.
This article provides an in-depth, engineering-focused look at creating accessible doorways. Below is a summary of the topics we will cover to help you make informed, cost-effective decisions for your home.
Summary: A Practical Guide to Widening Doorways on a Budget
- Budgeting for Widening: Why Moving Electrical Switches Spikes Costs?
- Swing-Clear Hinges: How to Gain 2 Inches Without Demolition?
- The Risk of Pocket Doors: Maintenance Issues for Seniors
- Wainscoting and Corner Guards: Preventing Wheelchair Scuffs?
- 5-Foot Turn Circle: Is Your Hallway Dead-Ending Your Mobility?
- Door Widening and Ramps: The Hidden Costs of Power Chairs
- When to Renovate: Proactive vs Crisis-Response Construction?
- How to Qualify for Government Grants for Accessible Renovations?
Budgeting for Widening: Why Moving Electrical Switches Spikes Costs?
The single greatest factor that inflates the cost of a simple doorway widening project is the presence of electrical wiring. When a light switch, outlet, or thermostat is located within the wall section slated for removal, the project scope expands dramatically. It’s no longer a carpentry job; it becomes a multi-trade endeavor requiring a licensed electrician. Costs can jump from a few hundred dollars to several thousand, as a simple widening project now involves rerouting wires, patching significant sections of drywall, and ensuring everything is up to code. Sources confirm that typical widening costs range from $300-$800 for materials without electrical work, but can escalate into the thousands once an electrician is involved.
However, before you budget for rewiring, consider the engineering principle of “bypassing the problem.” In many cases, you can neutralize the need to move the switch entirely. Smart home technology offers a highly effective, non-invasive workaround. By installing smart bulbs or switches, you can relocate the point of control without touching the in-wall wiring. This preserves the structural integrity of the wall and keeps your budget in check.
Consider these modern, cost-effective bypass solutions:
- Smart bulbs (like Philips Hue) that can be controlled by voice, a smartphone app, or a small remote.
- Smart switches (like Lutron Caseta) that replace the existing switch and can be paired with wireless remotes placed anywhere.
- Stick-on wireless remote controls that can be mounted at an accessible height, effectively creating a new “switch” without any wiring.
- Motion-activated lighting in hallways or bathrooms, which eliminates the need to interact with a switch at all.
This strategy transforms an expensive electrical job into a simple, DIY-friendly tech installation, perfectly aligning with a cost-conscious approach to accessibility.
Swing-Clear Hinges: How to Gain 2 Inches Without Demolition?
Before any demolition is considered, the most powerful and cost-effective tool in your arsenal is the swing-clear hinge. From an engineering standpoint, this is the most efficient way to gain usable space. Standard door hinges are designed so that when the door is open, the door itself still sits partially within the doorway, obstructing about 1.5 to 2 inches of the clear opening. A swing-clear hinge, also known as an offset hinge, has a unique pivot point that swings the door completely out of the doorframe.
This simple mechanical change can be the difference between a wheelchair fitting through a doorway or not. Installing these hinges on a 30-inch door can effectively create a 32-inch clear opening, meeting the ADA minimum for accessibility without a single cut into the wall. This is a prime example of a non-invasive solution that delivers a disproportionately large benefit.

As the image above illustrates, the genius is in the offset pivot design. This small piece of hardware is a testament to smart engineering over brute force. The financial and practical advantages become obvious when compared directly to standard hinges.
| Feature | Standard Hinges | Swing-Clear Hinges |
|---|---|---|
| Clearance Gained | 0 inches | 1.5-2 inches |
| Installation Time | 30 min | 45-60 min |
| Cost per Hinge | $5-10 | $20-30 |
| Weight Capacity | Standard | 80+ lbs |
While the upfront cost is higher per hinge, the total project cost is a fraction of what structural reframing would entail. For a minimal investment of time and money, you achieve a significant increase in functional space. It is the single most important first step in any doorway accessibility project.
The Risk of Pocket Doors: Maintenance Issues for Seniors
Pocket doors are often suggested as a space-saving solution for accessibility, as they don’t swing into a room or hallway. This is especially relevant as studies show a growing trend towards proactive home modifications; indeed, a Harvard study found that nearly 50% of individuals age 55+ planning home remodels focus on age-proofing. While pocket doors seem ideal on paper, they introduce significant long-term risks, particularly for seniors.
From a maintenance perspective, pocket doors have a critical flaw: their operating hardware is hidden inside the wall. The rollers, track, and guides are all susceptible to wear, misalignment, and debris. When a pocket door comes off its track or a roller fails, the repair is not a simple fix. It often requires opening up the wall to access the mechanism—a costly and disruptive process. For a senior or a person with limited mobility, a malfunctioning pocket door can instantly create a barrier, trapping them in or out of a room. The force required to slide a sticky or misaligned door can also be a challenge.
While premium systems exist to mitigate these issues, they come at a high price. For example, some high-end ADA-compliant systems are engineered with soft-close mechanisms and precision rollers, with some requiring as little as 5 pounds of force to operate. However, these professionally installed systems can cost from $800 to over $1,500, rivaling the cost of the structural work you were trying to avoid. For most residential applications, the risk of a high-maintenance failure point inside the wall outweighs the space-saving benefit compared to a reliable, easy-to-fix swing door.
Wainscoting and Corner Guards: Preventing Wheelchair Scuffs?
Once a doorway is wide enough, the next challenge is protecting the surrounding walls from the inevitable scuffs, dents, and scratches from a wheelchair or walker. Hallways, corners, and door casings are high-traffic areas that can quickly show wear and tear, making a home feel institutional rather than inviting. The solution is not just functional but can also be an aesthetic enhancement: integrated wall protection.
Instead of relying on stick-on plastic guards, consider installing wainscoting or a chair rail at a custom height. This architectural feature serves as a durable, continuous bumper that protects the wall surface while adding character and elegance to the home. When designed to match existing trim, it blends in seamlessly, looking like an intentional design choice rather than a medical modification. This approach transforms a practical necessity into a beautiful upgrade.

As the image shows, protection doesn’t have to be clinical. The right materials can elevate the space. For corners, which take the most abuse, you can choose from various materials that balance durability and style:
- High-density polycarbonate: The hospital-grade choice for maximum durability, available in clear or colored options to blend in or stand out.
- Stainless steel corner guards: Offers a sleek, modern look with lifetime durability.
- Integrated wood trim: Using the same wood and finish as your wainscoting or baseboards for a completely seamless, high-end look.
- Vinyl wall guards: A budget-friendly and easy-to-install option that comes in a wide variety of colors.
The key is to install these protective elements based on the specific dimensions of the wheelchair, ensuring the height covers the points of most frequent contact, such as the footrests and main wheels.
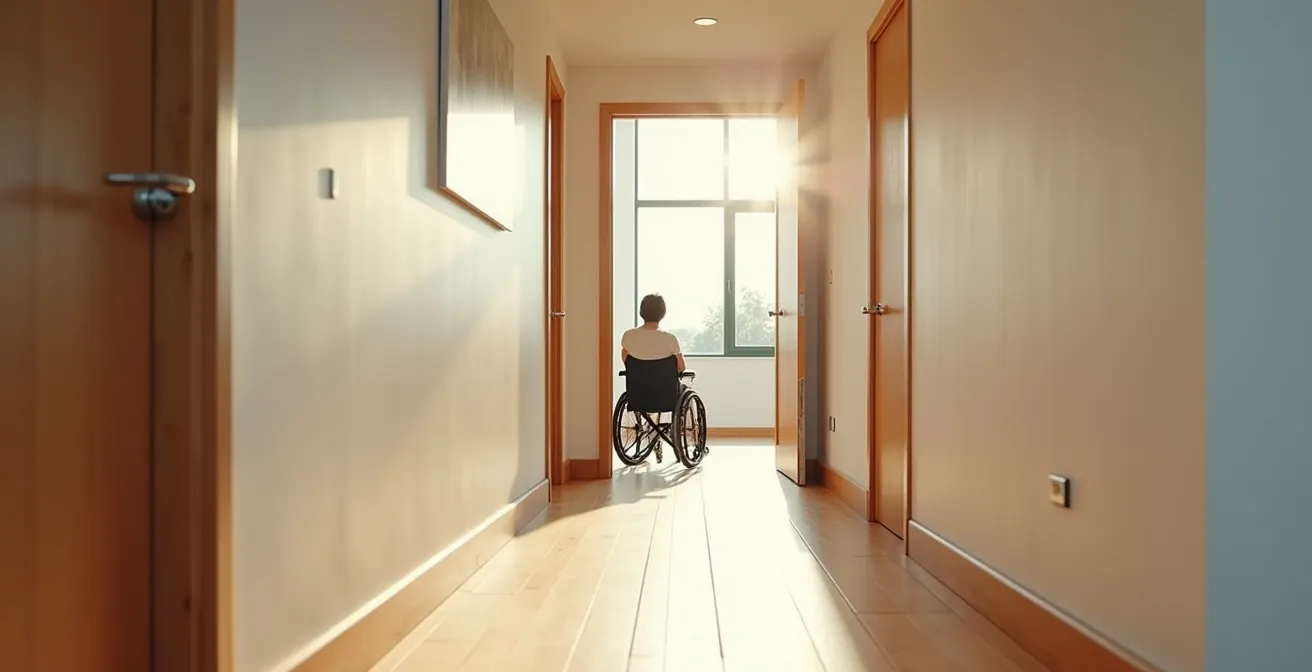
5-Foot Turn Circle: Is Your Hallway Dead-Ending Your Mobility?
Widening a single doorway is only part of the solution. True accessibility requires thinking about the entire path of travel. An engineer would analyze the “flow” and identify bottlenecks. The most common bottleneck is not the door itself, but the hallway leading to it. A wheelchair needs space to turn, and the gold standard for this is a 5-foot (60-inch) diameter turning circle. While this is not always achievable, understanding the concept is crucial for strategic planning.
Even if a door is wide enough, if the hallway is too narrow, a person may not be able to approach the door at the correct angle to pass through. This is where the concept of the “mobility triangle” becomes essential. This triangle connects the three most-used spaces in the home: the bedroom, the bathroom, and the kitchen. Instead of widening every door, you can achieve a massive improvement in quality of life by focusing only on the doors and hallways within this critical path.
The Americans with Disabilities Act (ADA) provides a crucial benchmark, stating that doorways must have 32 inches of minimum clearance width. However, a straight path is different from a turn. A 36-inch hallway might be fine for straight travel but can become a dead-end when a 90-degree turn into a bedroom is required. By strategically widening just one key doorway—for instance, the bathroom door at the end of a hall—you can create the necessary space for a multi-point turn, unlocking access to the entire home. Sometimes, simply removing and replacing the door trim with a thinner profile can add a vital extra half-inch of clearance on each side.
Door Widening and Ramps: The Hidden Costs of Power Chairs
Upgrading from a manual wheelchair to a power chair can be liberating for the user, but it introduces a new set of structural considerations for the home. Power chairs are significantly heavier and often wider than their manual counterparts. This extra weight has hidden consequences that go beyond just doorway width. One of the most overlooked factors is the immense point load they exert on thresholds and ramps.
A power chair with an occupant can easily impose 400+ lbs of combined weight on a small surface area. A standard aluminum threshold or a simple plywood ramp may not be sufficient. This weight requires reinforced thresholds and properly engineered ramps with gradual slopes (a 1:12 ratio is standard, meaning one inch of rise for every 12 inches of length). Failure to account for this can lead to damaged door frames, cracked flooring, and unsafe transitions.
Furthermore, power chairs have different maneuvering characteristics. While some have a tight turning radius, their overall footprint is larger, often requiring more than the standard 32-inch clearance, especially at turns. Finally, there’s the logistical need for charging. A dedicated charging station is required, which means planning for a conveniently located electrical outlet that doesn’t create a tripping hazard with its cord. Installing a new outlet can add several hundred dollars to the modification costs, circling back to the issue of electrical work.
Before investing in a power chair, it’s crucial to get its exact specifications—width, length, turning radius, and weight—to ensure your home modifications will be adequate. What works for a manual chair may not be sufficient for a powered one.
Key Takeaways
- Smart, non-invasive solutions like swing-clear hinges can often provide the necessary clearance without costly demolition.
- Proactive planning for accessibility is significantly less expensive and stressful than crisis-response construction after an emergency.
- Protecting walls and corners with integrated wainscoting is a durable and aesthetic way to maintain a home’s value and appearance.
When to Renovate: Proactive vs Crisis-Response Construction?
The most expensive time to renovate for accessibility is during an emergency. Following a fall, a stroke, or a sudden decline in mobility, modifications must be done under immense time pressure. This “crisis-response” construction model is fraught with financial and emotional stress. Contractors are in high demand, materials may be rushed, and there is little time to shop for competitive quotes or explore cost-saving alternatives. As a result, costs can be 30-50% higher than for a planned project.
A proactive, phased approach allows you to stay in control of your budget and timeline. By anticipating future needs, you can implement changes gradually, aligning them with your financial capacity and evolving mobility. This strategy breaks down a daunting, large-scale renovation into manageable, bite-sized projects spread over several years. This not only makes the process more affordable but also allows you to adapt to the modifications without the trauma of a sudden, life-altering event.
A typical phased aging-in-place roadmap might look like this:
- Tier 1 (Low-Cost, High-Impact): A few years before mobility becomes a major issue, focus on non-structural changes. This includes installing grab bars in bathrooms, replacing doorknobs with lever handles, and improving lighting throughout the home.
- Tier 2 (Strategic Modifications): As mobility needs increase, implement semi-structural changes. This is the ideal time to widen one or two key doorways using the cost-effective methods discussed, add a ramp to the main entrance, and install secure stair railings.
- Tier 3 (Major Renovations): This phase addresses major projects like a full, zero-threshold bathroom remodel or the installation of a stairlift, undertaken when the need is clear and the project has been properly planned and budgeted for.
By planning ahead, you transform renovation from a reactive crisis into a proactive investment in your long-term independence and safety.
How to Qualify for Government Grants for Accessible Renovations?
Even with a cost-conscious approach, accessibility modifications can represent a significant financial outlay. Fortunately, numerous government and non-profit programs offer grants and low-interest loans to help homeowners offset these costs. Navigating the application process, however, requires careful preparation and documentation. It is not something to be done hastily.
The key to a successful application is to present a clear, well-documented case that proves both medical necessity and financial need. Many programs require you to work with certified professionals who can help guide you. As experts from Certified Aging-in-Place Specialists (CAPS) note, these professionals are often knowledgeable about available funding and can be strategic partners in the process.
CAPS professionals are strategic partners who are often knowledgeable about local/national funding programs and can help navigate the application process.
– CAPS Remodeling specialists
To put yourself in the strongest possible position to qualify, you must be meticulously organized. A disorganized or incomplete application is the most common reason for rejection. Treating the process like a formal project is essential for success.
Your Action Plan: Assembling a Grant-Ready Application
- Establish Key Contacts: Identify the specific local, state, or VA programs you are eligible for and establish contact. Simultaneously, secure a detailed Letter of Medical Necessity from your primary healthcare provider outlining the required modifications.
- Collect Official Estimates: Obtain a minimum of three itemized quotes from licensed and insured contractors. The quotes must clearly detail the scope of work and costs for the exact modifications specified in the medical letter.
- Compile Personal Documentation: Gather all required personal documents, which typically include proof of home ownership, recent income statements or tax returns, and a list of all household members with their mobility limitations.
- Document the Need Visually: Take clear photos and videos of the current accessibility barriers in your home (e.g., narrow doorways, steps, inaccessible bathrooms). This visual evidence provides powerful, emotional context to your written application.
- Assemble and Submit: Organize all documents into a single, complete package. Double-check that every required form is filled out and signed before submission, ensuring there are no missing pieces that could delay or disqualify your application.
Start by identifying the single most frustrating doorway in your home. Purchase a set of swing-clear hinges and, in one afternoon, see for yourself how a small, strategic change can create a world of difference. This first step will build the confidence you need to tackle your home’s accessibility one smart, affordable project at a time.
Frequently Asked Questions About Doorway Modifications for Power Chairs
Do all doorways need to be modified for power chair access?
Not every doorway needs modification. Main entrances, bedroom doors, and bathroom doors are typically prioritized based on daily use patterns and the specific wheelchair model.
What width do power chairs typically require?
While ADA requires 32 inches minimum, power chairs may need up to 40 inches depending on the model and approach angle, especially at hallway turns.
How do charging requirements affect doorway planning?
A dedicated charging station near main thoroughfares requires electrical planning, potentially adding $200-500 to modification costs for outlet installation.